
In this post, we are going to see the simplest approach to create a Java project in eclipse IDE step by step.
Simple approach to create a new Java project in Eclipse IDE, Share It... Share on XPREREQUISITES:
- JDK must be installed on your machine. you can install any version of your choice but it would be advisable to go with Jdk 7 or 8 or any other higher version. In my case, I’ve JDK 8 installed in my machine.
- First launch the Eclipse IDE as shown in the post : (Launch Eclipse IDE). Once the Eclipse is ready then start following the below steps in order to build a Java project.
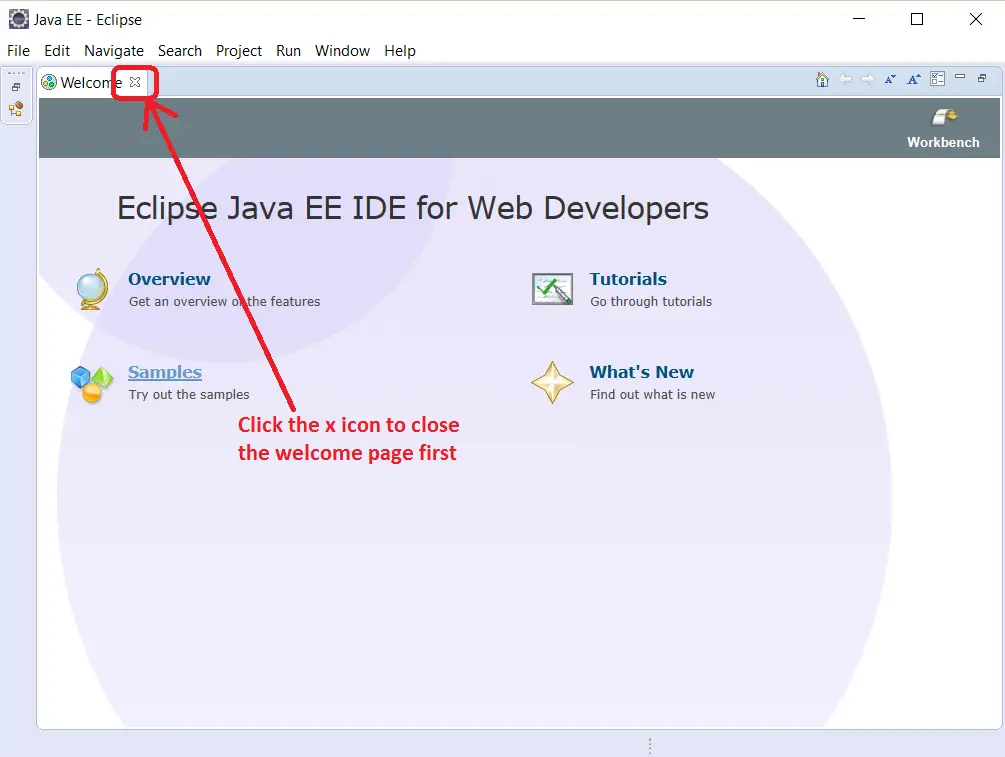
1. Close the ‘Welcome’ page that comes if you are launching the IDE for the first time, please see below screenshot.
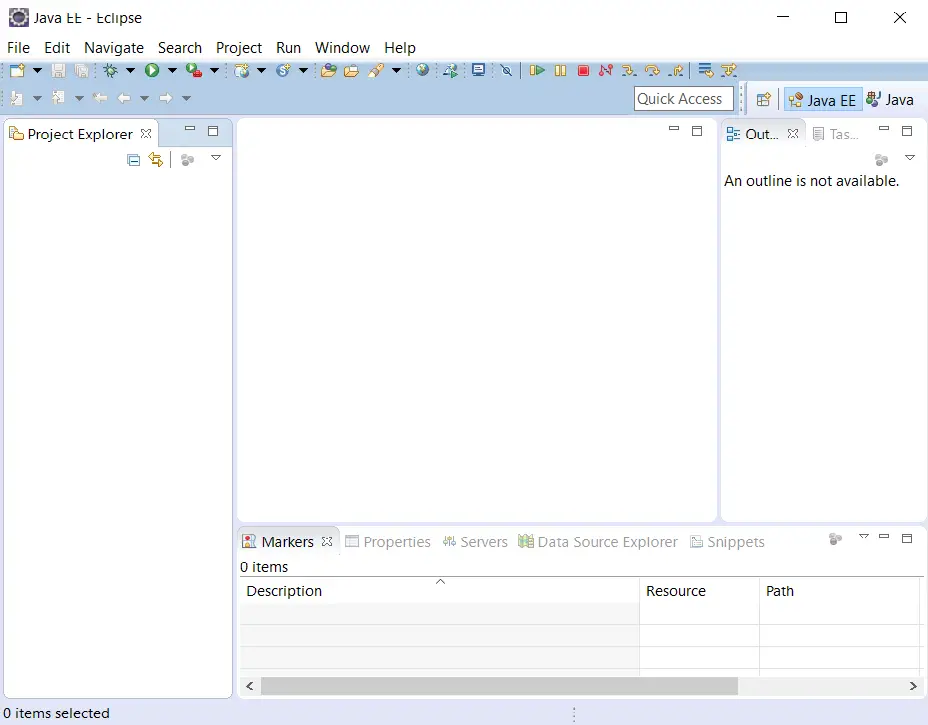
2. The default view of the IDE after closing the welcome page as shown in below screenshot.
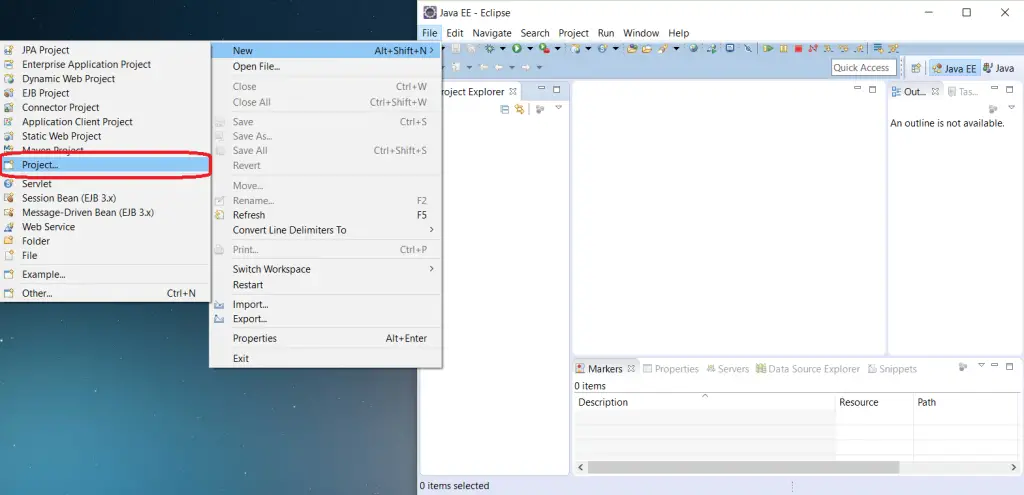
3. Click ‘File’ in the menu bar then choose New > Project… option as shown in below screenshot.
4. Once, click on ‘Project’ as per above step, a window will open to create a new Project as shown below and you would see the ‘Java Project’ option there.
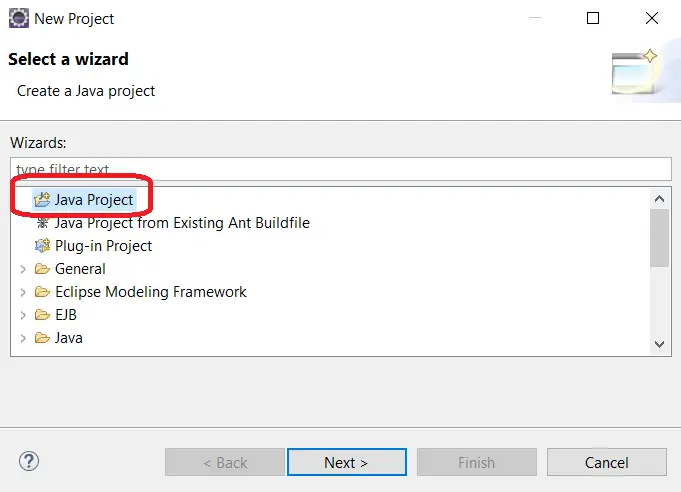
5. Look for the ‘Java Project’ as shown above in your wizard, select it and click the ‘Next’ button.
6. A window will open to ‘Create a Java Project’. Enter any project name (say FirstJavaProject), select the Java environment version from the drop-down list as shown below and click ‘Next’ button.

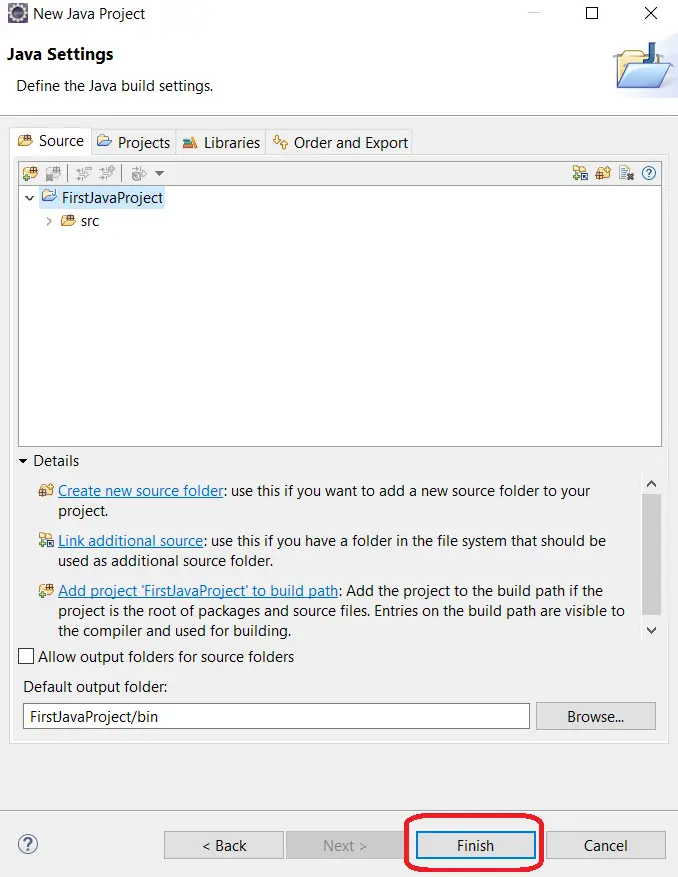
7. A ‘Java Settings’ window will open as shown below, click the ‘Finish’ button.
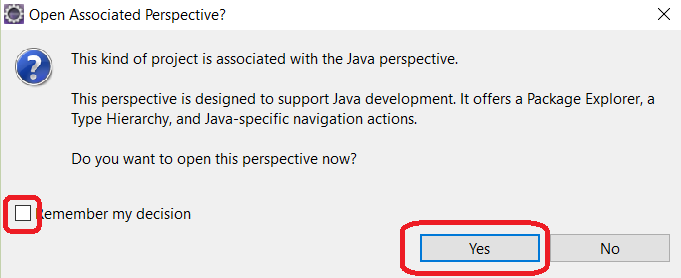
8. ‘Open Associated Perspective?’ window with the text ‘This kind of project is associated with Java perspective’ will open as shown in the below screen. Lets understand what’s this dialog signifies, As we downloaded JAVA EE Eclipse IDE thus the default perspective or in simple words default view of Eclipse IDE would be ‘JAVA EE’, but here we are creating a simple JAVA SE project, that’s why It is asking to switch the view to ‘JAVA’ only. Thus click ‘Yes’ button. (you can also select the ‘Remember my decision’ checkbox so that it won’t ask you this again)
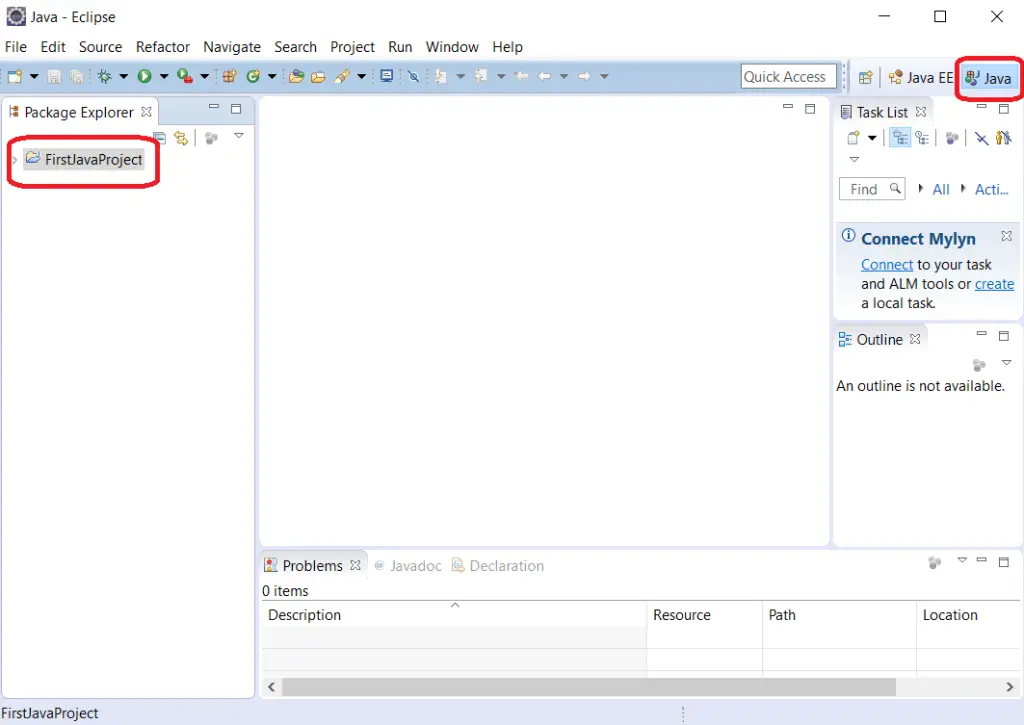
9. Hence you are able to create your first java project in eclipse as shown below. I have also highlighted in the following screen, the ‘JAVA’ perspective that we choose in step 8.
That’s it, it’s that simple to create your first Java project in eclipse IDE :)
Simple approach to create a new Java project in Eclipse IDE, Share It... Share on XIf you like this post , please check out my other useful blog posts:
Other Useful References:

