
This post will explain how to Create a Maven project in Eclipse. While creating a Java project in Eclipse, Maven can be handy and used to handle the dependencies required by the project automatically with the help of ‘Project Object Model’ i.e POM file. Rather than adding required JARs externally into the project, we can simply add them into the classpath with the help of POM.
Easy & Clean presentation of #Maven project creation in Eclipse...!!! Share on XLet’s begin creating the Maven project in Eclipse:
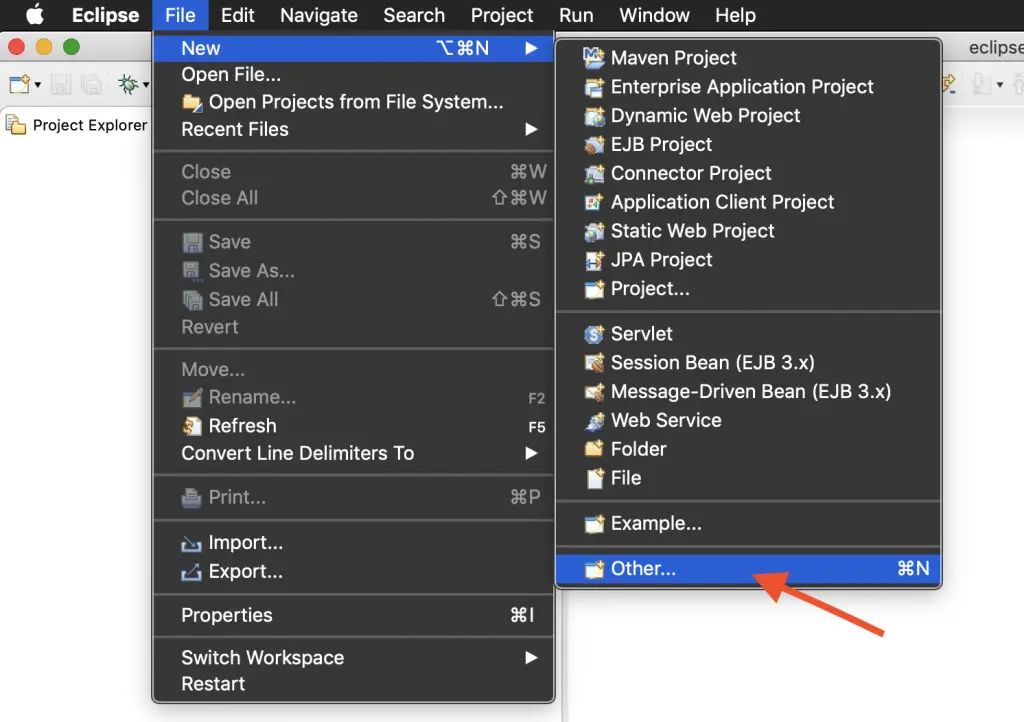
Step 1. Access Eclipse IDE and navigate to File > New > Other… This will open a wizard window to create the Maven Project.
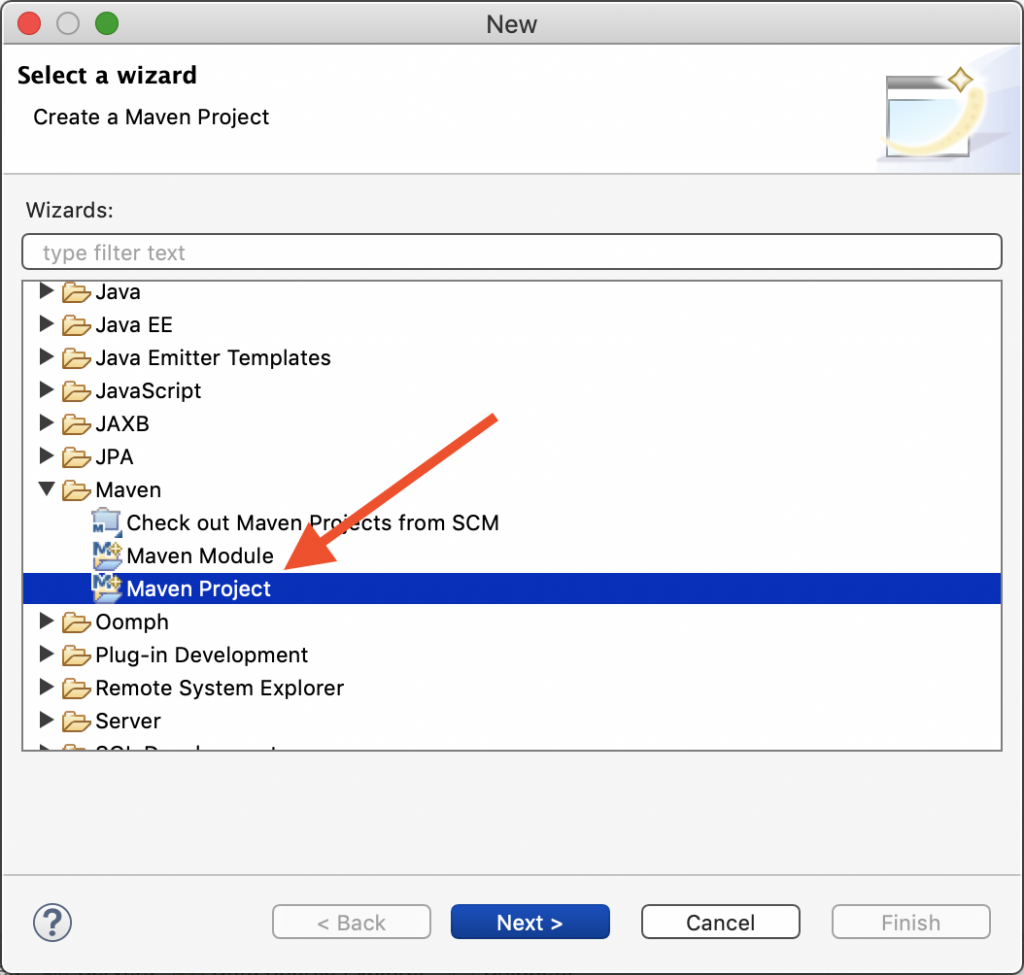
Step 2. Look for the Maven folder, expand it, and select the Maven Project and then click Next.
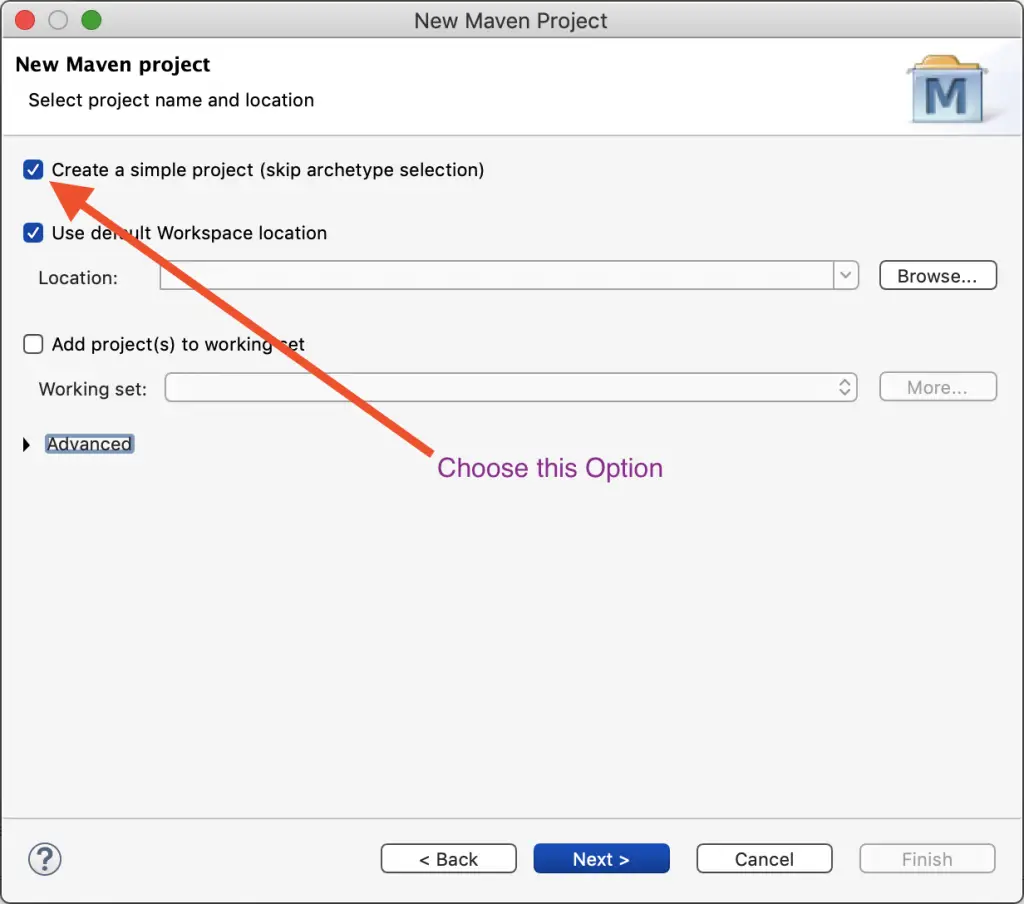
Step 3. ‘Create a simple Project’ option wouldn’t be checked by default. But, in this particular tutorial, we are going to choose this option as it would help to create simple Maven-Java project. If you are looking to set up advanced settings, then don’t check this option and continue, you’ll see various advanced options. Well, as we are going by the ‘Create a simple project’ option, then click the corresponding checkbox and then click Next.
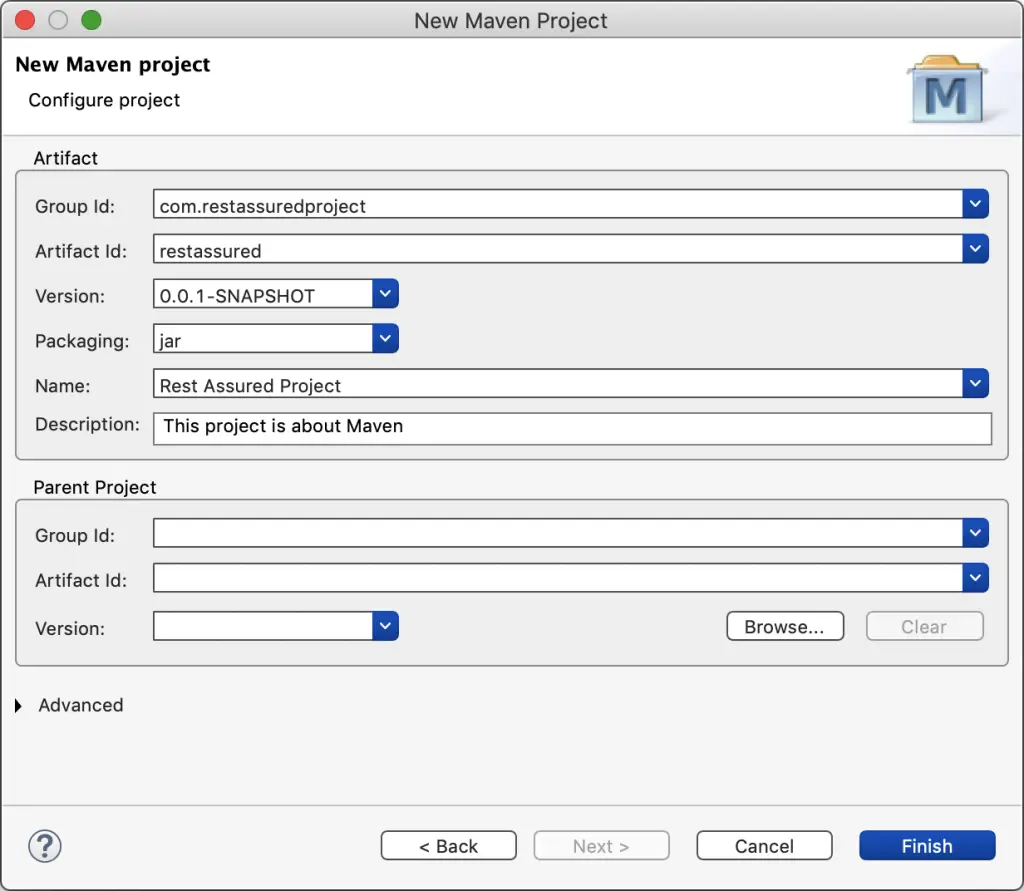
Step 4. Now, you will see a new window will open to configure the project. There you need to provide some required information for the Maven project. You need to provide information about the ‘Artifact’, ‘Parent Project’ Information and some other Advanced settings. Here we are go enter information about Artifact like ‘Group Id’, ‘Artifact Id’, ‘Version’, ‘Packaging’, ‘Name’ etc. In order to get a better understanding of the naming conversions of these attributes. Please check this link.
Let’s fill the information as shown below in the screenshot and click ‘Finish’.
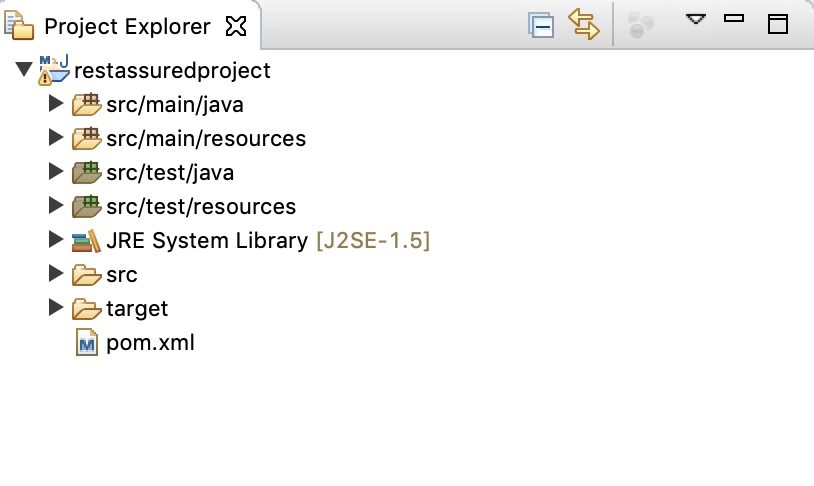
Step 5. Now, you will see that your project has been created in the left panel in eclipse under ‘Project Explorer‘. There you’ll see 4 major packages, 2 holds the ‘Main Java’ code and resources which are ‘/src/main/java’ and ‘/src/main/resources’ respectively while rest 2 belongs to ‘Test Java’ code and resources which are ‘/src/main/java’ and ‘/src/main/resources’ respectively.
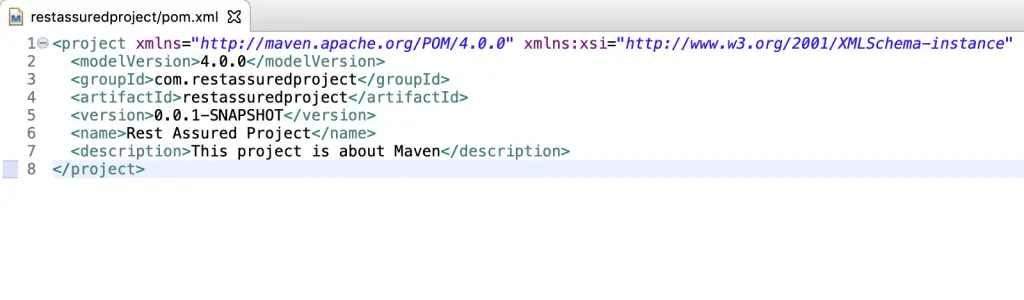
Step 6. Let’s open the pom.xml file to see what information it is holding up. In this file, you can see the information entered in previous steps about the Project like ‘Group Id’, ‘Artifact Id’ and other information.
 That’s it. It’s that easy to create a maven project in eclipse. Keep Learning :)
Check out the below video to create the maven project in eclipse:
Do you like this Post? :) – then check my other helpful posts:

thank you for all your efforts
Thanks
Hi there! Nice post! Please tell us when I will see a follow up!
Hello,
Thanks for showing interest in the post. I’m glad you liked it.
I’m going to add few new articles about other topics of rest assured in this week. You can subscribe to the blog to get the latest updates.
Probably, It would be of your interest.
If possible, please provide your valuable feedback about the existing content or kindly let me know if you have any topic in mind on which we should write posts.
Thank you
Thanks for sharing this post,
is very helpful article.
Thank you Simon. I am glad that it helped.
Hey Mack,
I am using hostgator for hosting my website. I never had any major issue with my website except 1 or 2 issues. But hostgator customer representatives fixed them instantly.
You can try hostgator.
Thanks
Have you ever had problems with your hosting? I’m open for referrals as my webhost is
horrible currently.